Discover the Magic of Homemade Grape Juice: No Cooking Required!
There's nothing quite like the vibrant taste of homemade grape juice, brimming with natural sweetness and the essence of summer. While many recipes involve simmering grapes on the stovetop or using specialized juicers, there's a wonderfully simple and surprisingly effective method that allows you to make and preserve delicious grape juice without ever directly cooking the fruit: the no-cook canning method. This technique captures the freshest flavor of your grapes, offering a rewarding experience that yields a pantry full of liquid sunshine.
Forget the long hours over a bubbling pot; this easy canning recipe lets boiling water and time do all the work, transforming fresh grapes into a concentrated elixir ready to be enjoyed for months. If you've been wondering how to make grape juice that's both effortless and bursting with pure grape flavor, you're in the right place. We'll guide you through selecting the best grapes, the simple canning process, and crucial tips for achieving the most delightful homemade grape juice.
Why Choose the No-Cook Canning Method for Grape Juice?
The idea of making grape juice without cooking might sound counterintuitive, but this "no-cook" canning method is a time-honored tradition that offers several compelling advantages:
- Unparalleled Fresh Flavor: By avoiding direct heat application to the grapes, this method preserves a fresher, more delicate grape flavor that can often be lost during prolonged stovetop cooking. The gradual infusion allows the fruit's natural sugars and acids to meld beautifully over time.
- Simplicity and Ease: This recipe truly lives up to its "easy" moniker. There's no mashing, straining hot pulp, or tending to a simmering pot for hours. You simply pack grapes, add sugar and hot water, and process.
- Efficient Use of Time: While the processing time is similar to other canning methods, the active preparation time is significantly reduced. This makes it an excellent choice when you have a bounty of grapes but limited time for intensive kitchen work.
- Long-Term Storage: Canning allows you to enjoy the taste of fresh grape juice all year round, long after grape season has passed. It's a fantastic way to utilize excess grapes and stock your pantry with healthy, homemade beverages.
This method differs significantly from other popular ways to make grape juice, such as using a steam juicer or a stovetop method that involves simmering grapes directly. While those methods are excellent for maximizing yield, the no-cook canning approach prioritizes ease and a remarkably pure flavor profile. For a deeper dive into grape varieties and their juicing potential, explore our guide on Best Grapes for Juicing: Unlock Peak Flavor & Health Benefits.
Selecting the Perfect Grapes for Your Juice
The quality of your grapes is paramount to the deliciousness of your homemade juice. While many grape varieties can be juiced, some are truly exceptional for this no-cook canning method:
- Concord Grapes: These are the undisputed champions for juicing. Known for their deep purple color, robust "grapey" flavor, and natural sweetness, Concord grapes yield a classic, aromatic juice that's rich in antioxidants. Many traditional grape juice recipes, including this canning method, were developed with Concord grapes in mind.
- Other Purple Grapes: Varieties like Isabella or Niagara (though Niagara is green/white, it offers a distinct, sweet-tart profile) are also excellent choices, providing good color and a pleasant balance of sweetness and acidity. Muscadine grapes, with their thicker skins and unique muskiness, can also be used for a more rustic, intensely flavored juice.
- Green Grapes: For a tangier, brighter juice, consider varieties like Thompson Seedless or Niagara. You can also blend green grapes with purple ones for a more complex and well-rounded flavor profile.
Key Selection Tips:
- Ripeness is Key: Look for grapes that are fully ripe, plump, and have a deep, uniform color (for purple varieties). They should smell fragrant and be firm to the touch. Avoid grapes that are shriveled, soft, or show signs of mold.
- Remove Stems and Leaves: Before processing, always remove all stems and leaves. These can impart a bitter taste to your juice, detracting from its natural sweetness.
- Wash Thoroughly: Rinse your grapes under cool running water to remove any dirt, debris, or residual sprays.
Step-by-Step Guide: Easy No-Cook Canned Grape Juice
This method is surprisingly straightforward, requiring only a few ingredients and basic canning equipment. Here's how to make grape juice with our easy canning recipe:
What You'll Need:
- Grapes: Approximately 2-3 pounds per quart jar (adjust based on how tightly you pack them).
- Sugar: 1/4 to 1/2 cup per quart jar (optional, adjust to your desired sweetness and grape variety).
- Water: Boiling hot.
- Canning Jars: Pint or quart-sized, with new lids and bands.
- Canning Pot: A large stockpot with a rack, deep enough to cover jars by at least an inch of water.
- Canning Tools: Jar lifter, canning funnel, bubble remover/de-bubbler tool, clean cloths.
The Process:
- Prepare Your Jars: Wash your canning jars, lids, and bands in hot, soapy water. Rinse well. Keep the jars hot (e.g., in a simmering water bath or dishwasher) to prevent thermal shock when adding boiling water later. Set new lids aside; bands do not need to be sterilized.
- Prepare the Grapes: Remove all grapes from their stems. Wash them thoroughly under cold running water. You can cut larger grapes in half if desired, but it's not strictly necessary. No need to remove seeds for this method, as the juice will be strained later.
- Pack the Jars: Using a canning funnel, loosely fill your hot, clean jars with the prepared grapes. You can pack them fairly tightly, leaving about 1 inch of headspace from the top of the jar.
- Add Sugar (Optional): If desired, add sugar to each jar. A good starting point is 1/4 cup for pint jars and 1/2 cup for quart jars, but this is entirely to taste. For naturally sweet grapes, you might omit sugar entirely.
- Add Boiling Water: Carefully pour boiling water over the grapes in each jar, leaving 1/2 inch of headspace. This hot water will begin the gentle extraction process.
- Remove Air Bubbles: Use a non-metallic bubble remover tool or a clean chopstick to gently dislodge any trapped air bubbles by running it around the inside of the jar. Add more boiling water if necessary to maintain 1/2 inch headspace.
- Seal the Jars: Wipe the rims of the jars clean with a damp cloth to ensure a good seal. Center a new, hot lid on each jar, then screw on the band fingertip-tight (just until resistance is met, no overtightening).
- Process in a Water Bath: Carefully place the filled jars onto the rack in your canning pot. Ensure the jars are covered by at least 1-2 inches of water. Bring the water to a rolling boil.
- Boil for Recommended Time: Once the water is boiling, process pint jars for 15 minutes and quart jars for 20 minutes. Adjust processing time for altitude if you live above 1,000 feet.
- Cool and Store: After processing, turn off the heat and let the jars sit in the hot water for 5 minutes before carefully removing them with a jar lifter. Place them on a towel-lined counter, spaced apart, to cool undisturbed for 12-24 hours.
Once cooled, check the seals. Lids should be concave and not flex when pressed. Remove bands, wipe jars clean, label, and store in a cool, dark place. Any unsealed jars should be refrigerated and consumed within a few weeks.
Tips for the Best Homemade Grape Juice Experience
While the recipe is simple, a few extra tips can elevate your homemade grape juice from good to truly exceptional:
- Patience is a Virtue: The most crucial tip for this method: resist the urge to drink your juice immediately! For the best flavor development, allow the canned juice to sit for at least 3 months, or even longer, before opening. This resting period allows the flavors to deepen and fully meld, creating a richer, more complex taste.
- Strain Before Serving: When you're ready to enjoy, open a jar and strain the liquid through a fine-mesh sieve, cheesecloth, or a nut milk bag to separate the juice from the pulp and skins. The grapes will have softened considerably, releasing all their goodness into the liquid.
- Adjust Sweetness Later: If you're unsure about sugar content, use less or no sugar during canning. You can always add a touch of honey, maple syrup, or sugar when you're ready to drink, ensuring it's perfectly to your taste.
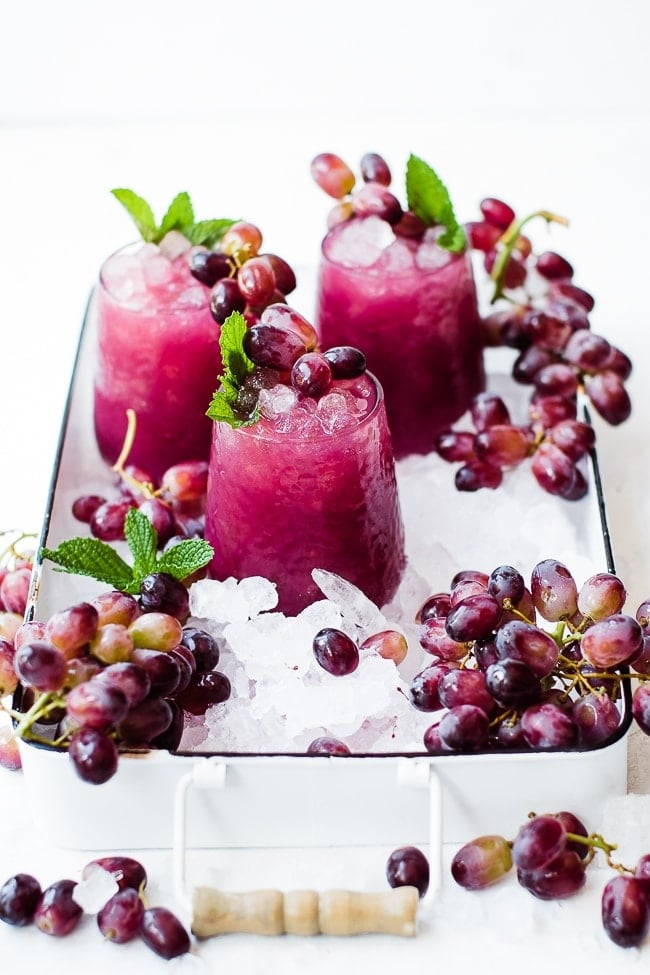
- Serve Chilled and Dilute: Homemade grape juice is often quite concentrated. Serve it chilled, and consider diluting it with still water, sparkling water, or even a splash of lemon-lime soda for a refreshing spritzer.
- Creative Uses for Leftover Pulp: Don't discard the strained grape pulp! While it might be a bit bland after its juice has been extracted, it can be composted, added to smoothies for extra fiber, or even pureed and mixed into baked goods for a hint of flavor (though its primary flavor has gone into the juice).
This easy method is a fantastic way to enjoy the purest essence of grapes. For other fantastic ways to transform your grapes into juice, whether you have a juicer or not, refer to our comprehensive guide: How to Make Grape Juice: 5 Easy Methods With or Without a Juicer.
Savoring the Simplicity
Making grape juice without cooking is an art form in simplicity. This easy canning recipe not only preserves the fresh, vibrant flavor of your harvest but also provides a deeply satisfying connection to the food you consume. With minimal effort upfront and a little patience, you'll be rewarded with jars of exquisite, homemade grape juice—a healthy, delicious, and refreshing drink that brings the taste of the vineyard right to your table, any time of year. So gather your grapes, ready your jars, and get ready to savor the simple magic of homemade, no-cook grape juice!
